Adapters View
The Adapters View lists and controls the adapters used as a source of network traffic in the application. If the view is not visible, show it by selecting the View > Adapters View menu item. The adapters list will be empty the first time you open the view. You need to populate this list by manually adding each adapter as needed go to Adding Adapters section for instructions.
Once the list has been populated, each adapter will be displayed in an individual control containing the following information: status, extended status, alias, and a switch to change the adapter status (see the figure below).

The status will display Unavailable if the adapter is not plugged to your computer, Disconnected if the adapter is plugged but not connected to the application, Available if it is connected but not in use, Running when it is being used, and Running on another instance if it is being used by a different instance; the table below shows the summary of this. The extended status will display additional information related to the role of the adapter in the application. For instance, the extended status of a sniffer adapter capturing packets will show the channel and protocol stack used for decoding.
| Icon | Status | Color | Description |
|---|---|---|---|
 |
Unavailable | Gray | Unavailable. It might not be plugged or recognized by the OS |
 |
Disconnected | Brown | Available but disconnected from Ubiqua |
 |
Available | Amber | Available and ready to be used |
 |
Available disconnected | Amber Dimmed | Available but connected to another instance of Ubiqua |
 |
Running | Green | The adapter is running |
 |
Running on another instance | Green Dimmed | Being used by another instance of Ubiqua |
 |
Error | Red | An error has occurred |
Adding Adapters
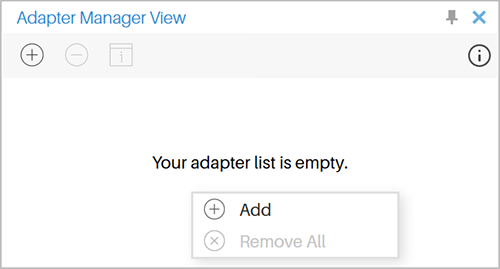
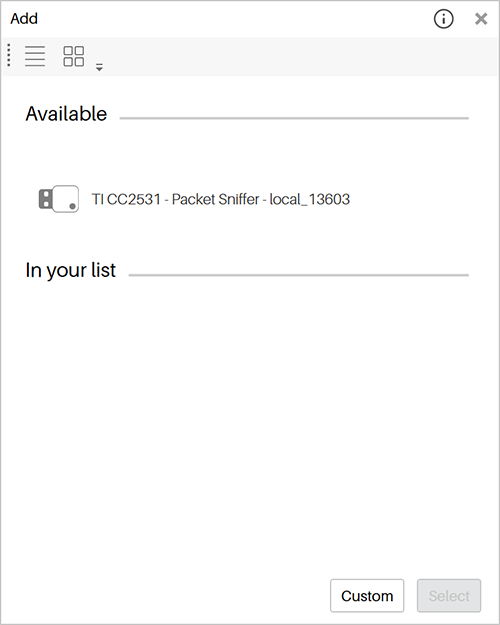
To add a new adapter to the list, right click inside the Adapters View and select the Add menu item, or click the Add Adapter button on the top of the Adapters View. After opening the Add Adapter dialog (see the figure below), if your adapter is compatible with Ubiqua (see Supported Sniffer Hardware for details) and was able to identify it, then your adapter will be in the Available list.
If your adapter is in the supported adapters list, but you don’t see it in the Add adapter dialog, make sure you have the correct drivers installed.

If your adapter is in the Available list, just select the adapter and click on the Select button. At this point the adapter should have been added to the adapters list, unless the adapter supports multiple applications. If that is the case, you have to select a supported application (see the figure below) and then click in the Select button.

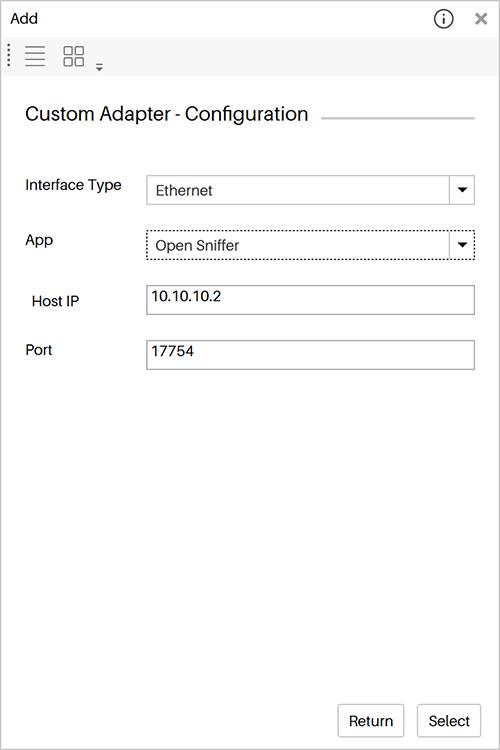
The adapter you want to add to your adapters list, may not have been discovered by the Adapters View automatically. If that is your case, what you need to do is click on the ‘Custom’ button which will open the configuration dialog (see figure below) where you can select interface type (UART or IP), interface ID, and the supported application the adapter is using.

When setting up a SEWIO Open sniffer for the first time, you must configure the adapter via its web interface, additional information can be found in SEWIO Hardware.
Ubiqua doesn’t offer support for Windows 7, however you could still use it but most adapters wil need to be added though the ‘Custom’ method.
SEWIO Adapter
In order to use the Sewio Open Sniffer in Ubiqua, it must be connected and configured in the same subnetwork as the computer running Ubiqua. Please refer to Part 1 of the Sniffer Installation.
The process of configuring the sniffer in Ubiqua is simple. First, we add the Sewio by right clicking on the Adapters View or via the Adapter main menu, and selecting the Add option.
In the Add Adapter window, click on the Custom button to add as a custom adapter.
Then select the configuration parameters; Interface Type should be Ethernet, App is Open Sniffer, then Host IP and Port the appropriate for the Sewio adapter.
At this point the Sewio adapter is added to Ubiqua.
Configuring Adapters
Once an adapter is added to the list, you can configure its properties by right-clicking on the adapter and selecting the View Properties menu item (see the figure below). This will open the Properties view, where the properties can be edited. As long as the Properties view is open, it will show the properties of the selected adapter in the Adapters View.

Ubiqua provides shortcuts to some of these configurations; configure radio, protocol stack, and channel are options in the adapter contextual menu. Right click on an adapter and make your selection, Ubiqua will automatically restart the adapter if it was running.
Radio configuration
The adapter you select to use may support several radio configurations (modulation, frequency band, data rate), to change between them use the contextual menu item Config Radio (see figure below). Here you can find options to select each of the adapter’s supported radio configurations.

Protocol stack
This options allows you to select the stack which will be used to decode the data captured by the selected adapter.

Channel
The available channels can change depending on the selected radio configuration. You can move the slider to select a channel or directly write it in the text box (see image below).

Capturing Traffic
To start capturing packets click on the adapter switch button or select the Start/Stop on the contextual menu. If a problem was found starting the adapter and you can’t stop or start it anymore, proceed first toggle the Connect/Disconnect option twice. If that doesn’t fix the problem then unplug the adapter and plug it back to your system; usually, this will resolve the problem. If you keep experiencing problems, make sure the port is not being used by another program in your system and try again. Also, please note that according to your license you could be limited to a certain number of adapters started at the same time. Whatever the cause of the problem is, the extended status of the adapter in question (found in Properties View) will display a possible solution.
Removing Adapters
Adapters on the list are maintained by the application and stored in environment files. To remove an adapter right click on it and select the Remove menu item. If you want to remove all adapters right click on the Adapters View view and select the Remove All menu item. Please note that this action can’t be undone.
Scanning Channels
Scan channels allows capturing through all channels or the selected channels. Each selected channel will capture during a specific time, at the end, Ubiqua will show the number of captured packets per channel on a graph. While UBiqua is scanning a channel all captured traffic will be displayed in the Traffic View, you can use this to select which channel you want to set your adapter to capture.
To scan channels, right click on the adapter and select the Scan Channels menu item. After the Scan Channels dialog opens, select the channels to scan and set the scanning time per channel; to start the scanning process press the Start button. The Scan Channels dialog will hide while the scan process is in progress, to stop the process you can open the dialog again from the context menu or jut click on the Stop button in the Adapters View.
The graph in the Scan Channels dialog will display the packets captured per channel when you place the mouse over any channel. Note that the packets captured during the scanning process may appear in the Traffic View and that the channel list may be different, depending on the capabilities of the adapter used for scanning.

Multiple Ubiqua instances
Ubiqua uses a service we called the Adapter Manager. This service manages the resources (adapters) of its host and interacts with the different communication interfaces (UART, USB, IP, etc.) available, multiple instances of Ubiqua connect to one Adapter Manager running in the host as clients, and then consume those resources.
An adapter can only be connected and be used by one Ubiqua instance at a time. Because of this, we have provided an option under the adapter contextual menu to force the connection of an adapter that is Idle but connected to a different instance (see image below). To know if an adapter is connected to another instance but in an idle state, you will see the light blue color in the status indicator and the Start button will be disabled, to connect the adapter to the current instance you can use the Force Connect option in the context menu of the selected adapter, this will effectively steal the adapter from the instance that had it originally.
If another instance of Ubiqua has started an adapter and is using it, the status dot will be dark blue in color; then the force connect will be denied if attempted. You can find the exact status of an adapter its Properties.
