Settings
Preferences
To start setting your preferences open the Preferences dialog by selecting the Tools > Preferences in the main menu Ubiqua. You will find below the description for each section.
General
Auto Save
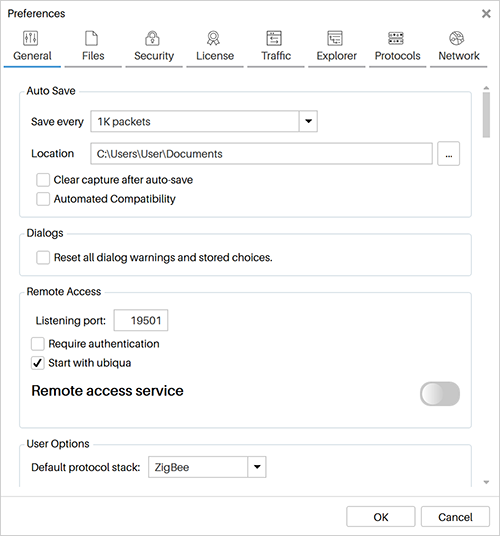
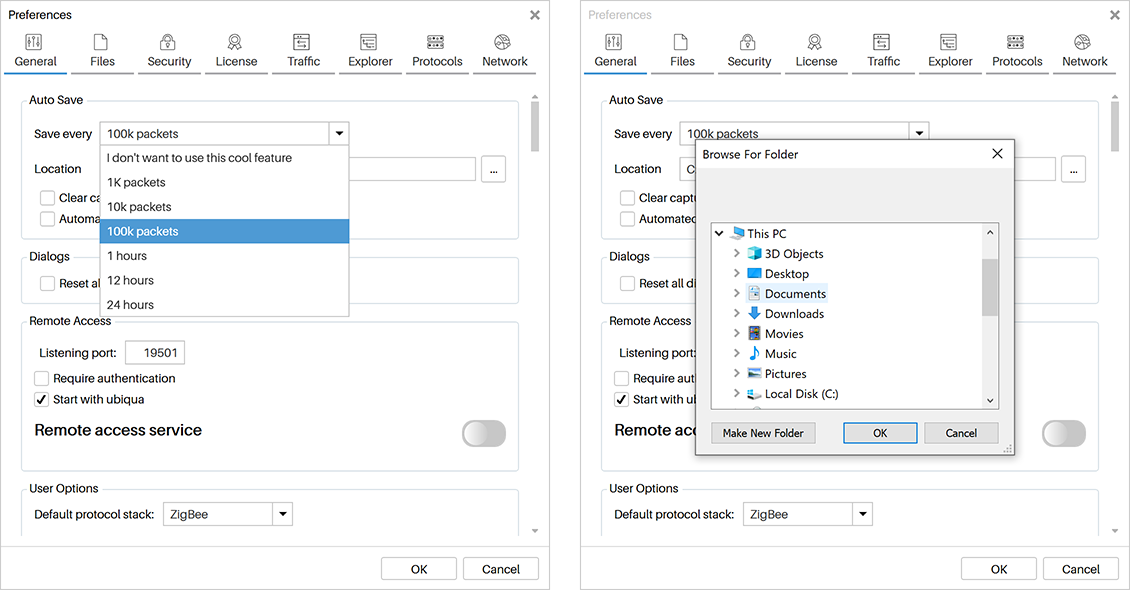
This feature automatically creates segmented files of live captures. The user can set the option to save capture files every certain number of packets or determine a time interval to perform this task. This feature is helpful for cases where there will be long periods of capture time. When enabled, Ubiqua may generate multiple files in the indicated path, each file will contain a segment of the full trace. To enable this feature open the Tools > Preferences menu, go to the General tab and find the Auto Save section.
In the Auto Save section below the Location field you can find the Clear capture after use auto-save and Automatic Compatibility options. When the former is checked, every time the Auto Save task is performed, the Traffic View will be automatically cleared, deleting all the capture packets that were saved, and displaying only those packets that will be part for the next Auto Save segment. If the Automation Compatibility option is selected, then when Ubiqua restarts after closing unexpectedly, it will not show any of the dialogs requiring a reaction from the user (i.e. capture recovery, crash report), which makes it a good choice for those who are running automated tests. Recovery dialogs are available throughout the main menu inside the application.

Dialogs
Ubiqua implements dialogs to remember the user’s choices within the system. These dialogs have a remember my choice option to save the user preference and to suppress the same dialog in the future. The stored choices for the dialogs can be reset using the Reset all dialog warnings and stored choices checkbox in the General tab.
Saved dialog choices:
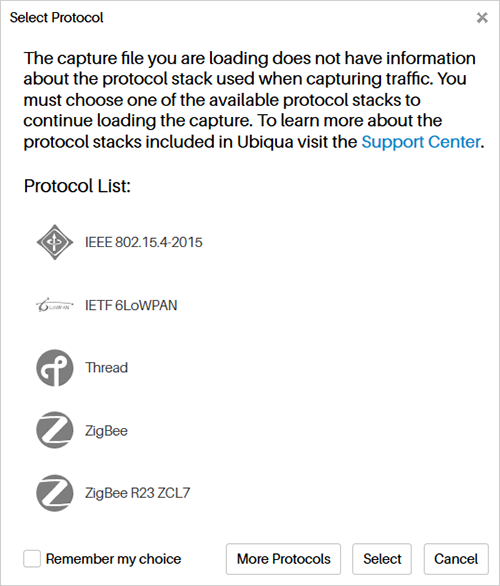
- Select Protocol dialog: appears when a capture file that does not contain protocol information is opened. The user can choose one of the supported protocols to decode it and by checking the remember my choice setting the selected protocol will be the default to open the following captures.
- A dialog opens if the Frame Checksum validation fails, and the user can choose between appending 2 more bytes with the correct checksum, replacing the last 2 bytes with the correct checksum, or do nothing; the remember my choice will suppress the dialog when opening following captures.
- Immediate Filter Application dialog: opens each time a new filter is created.
Remote Access
This option toggles on or off the Ubiqua Services, which are web resources that expose certain Ubiqua functions for remote use. See here for more info.
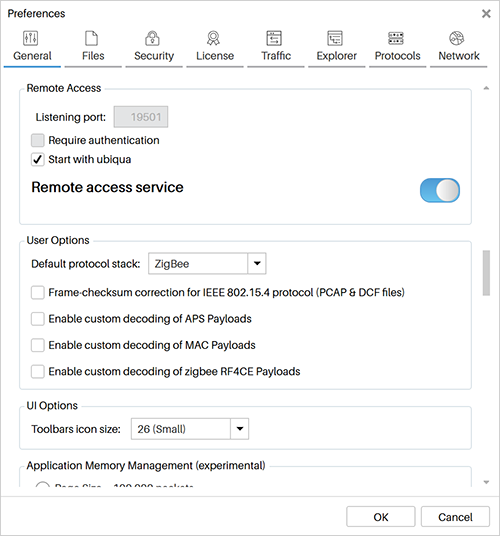
User Options
In this section you can set up the following settings.
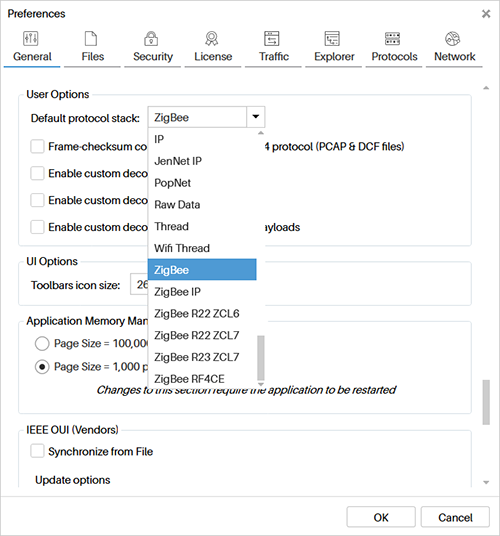
Default Protocols
Here you can set the default protocol stack, that you prefer to use for captures without the protocol information.
FCS Correction
With the Frame Checksum validation checkbox you can decide what Ubiqua should do when it finds packets with incorrect FCS.

Custom Payloads
Then you have the options to enable custom payloads as described in section Custom Payloads
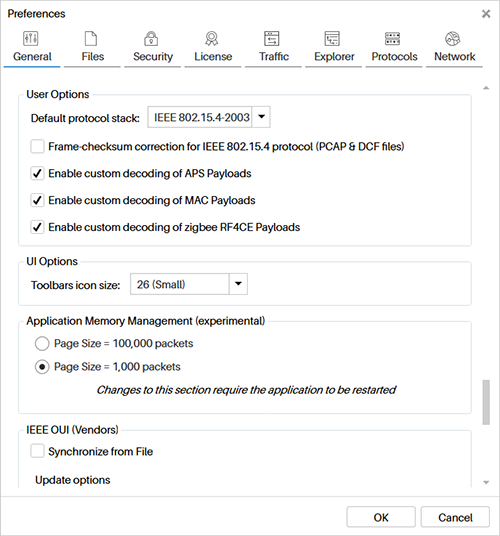
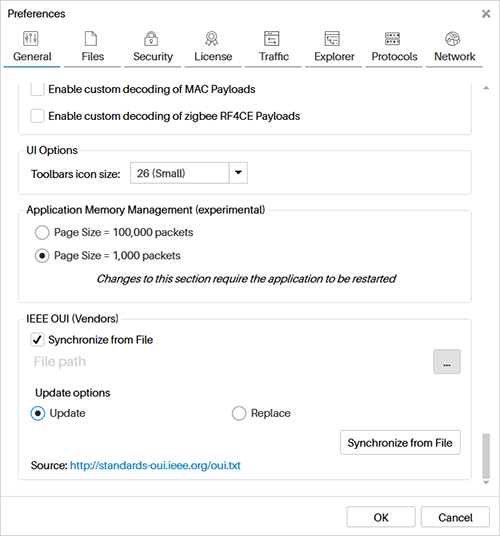
UI Options
Select the icon size you prefer for the UI toolbars icons.
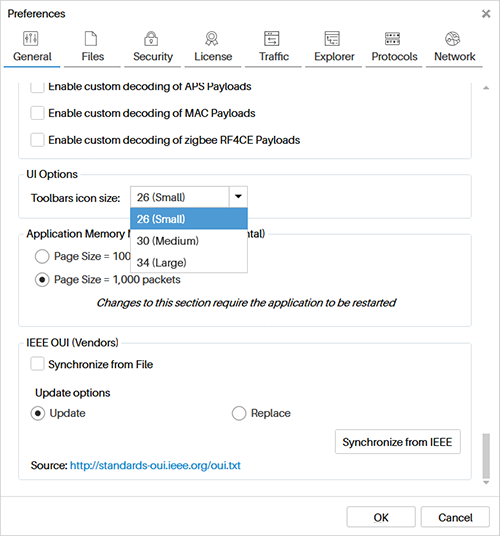
IEEE OUI Vendors
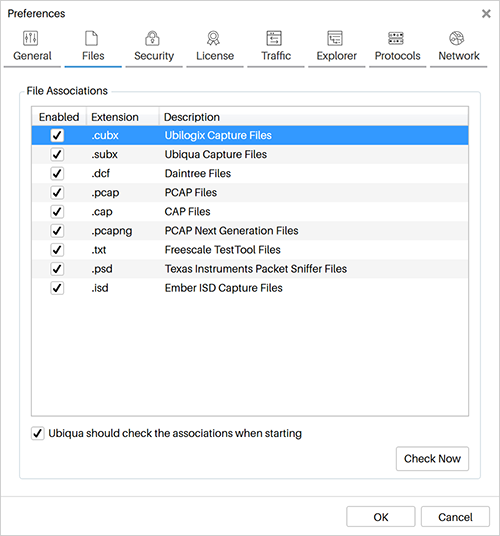
Files Associations
You can set up Ubiqua as the default application to open capture files when you double click on them in your system. To do so, open the Preferences window, select the Files tab, and you will see a list of the supported capture files and extensions. Click the checkboxes on the Active column to associate Ubiqua to that file format. Use the checkbox at the bottom to make Ubiqua check if the associations are correctly set on your system each time it starts.
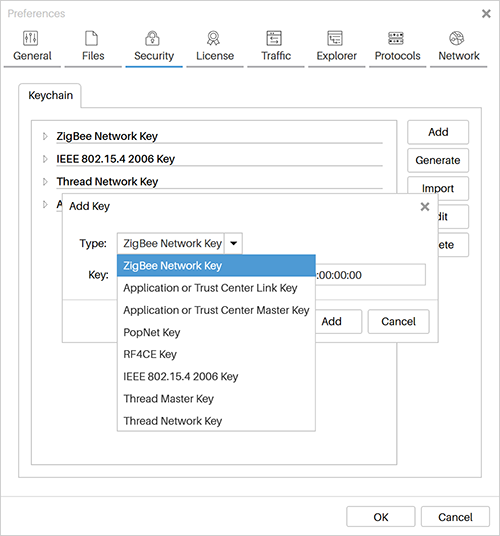
Security Keychain
Security keys for decoding purposes are managed on the Security > Keychain tab of the Preferences dialog. In this tab, you are presented with a list of all the security keys available in Ubiqua. These keys can be discovered in the capture data or added manually by the user. Use the buttons on the right to add, edit, delete, or import keys.
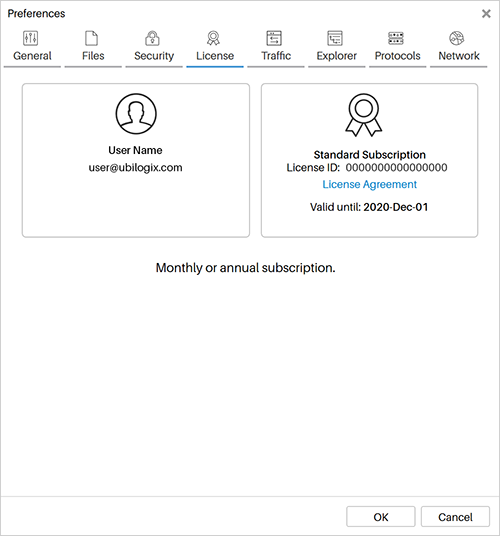
License Management
You will find it in the Licenses tab. Here, in the left section, you can see the account information (name, email, and business) to which the license is assigned. The right section shows the license’s information: type, identification number and expiration date.
Be sure to include your License ID when requesting support to support@ubilogix.com.
Traffic
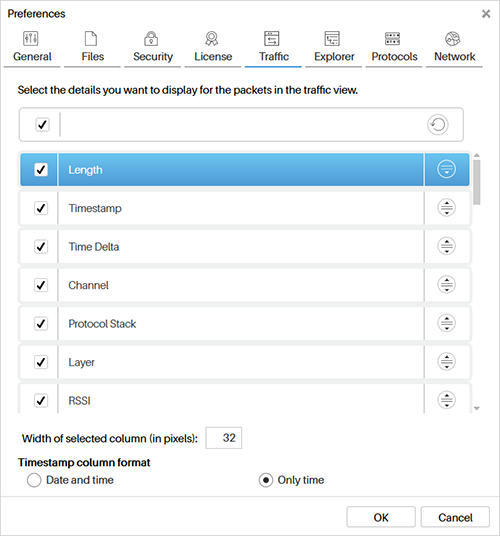
Select the columns you want to be displayed in the Traffic View and each width in pixels, and decide if the Timestamp should include the date.
Explorer
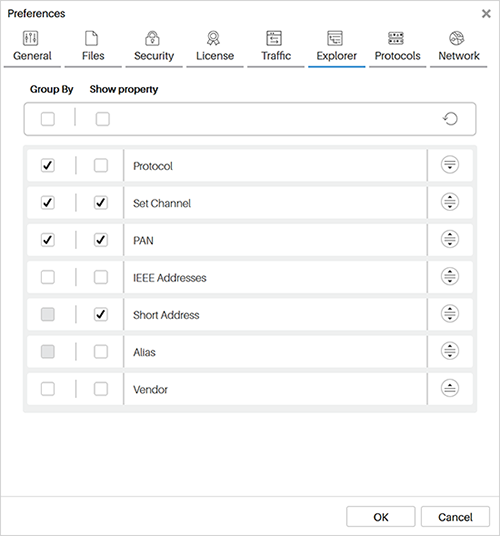
Select how you want to group nodes in the network explorer, and which properties of the nodes will be visible there.
Protocols
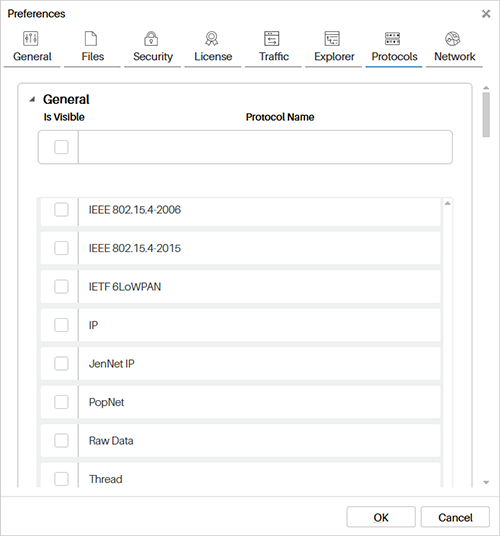
Select the protocols that will be visible in the list for the Change Protocol Stack and the Select Protocol dialog that opens when there is no protocol information in the capture.
If you scroll down below in this section you can also set the CoAP Custom Port to allow Ubiqua to listen on a designated UDP port and decode incoming traffic as CoAP.
Network
This tab contains the information about the network and its nodes (devices).
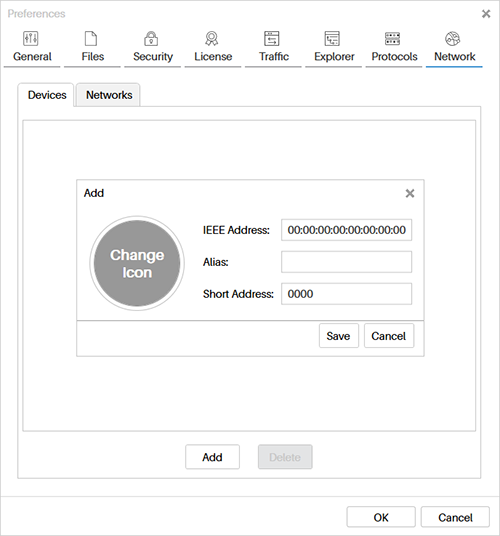
Devices
The list of devices that have been in the network is displayed in this section located in the Tools > Preferences > Network > Devices tab. Each element of the list is composed by the long address followed by the alias assigned by the user (if the user customized the device). The devices can be discovered or manually added, to edit a devices’s properties just right click on it in the list. The Customize window can also be accessed by right clicking on the node in the Graphic View or with the Customize button in the Properties View.
Networks
When you need to have an organized list of your networks you can customize their alias, this will make them appear listed in the Tools > Preferences > Network > Networks tab. Each item on the list will be composed of the extended PAN ID id followed by the custom alias you assigned, networks without a customized alias will not appear in the list.
To customize a network alias follow the next steps:
- Group the devices by PAN in the Network Explorer view.
- Within the Network Explorer tree visualization select the PAN node that has the PAN ID and Extended PAN ID attributes of the network.
- Go to the Properties View where the information of the network will be automatically loaded.
- At the bottom of the Properties view Uncheck the Use default alias box to make the Alias input editable.
- Type your network alias, click outside the text input. The PAN node in the Network Explorer view will be automatically updated, replacing the default PAN ID alias with the new one. The customized element will be added to the mentioned list of networks within the
Tools > Preferences > Network > Networkstab.
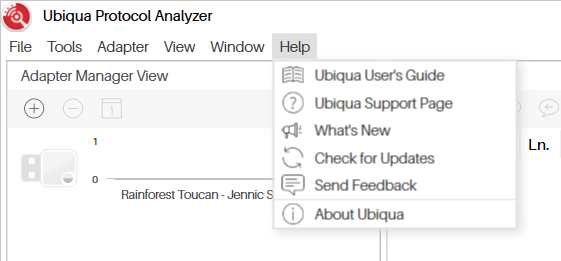
Check for Updates
The Check for Updates option is in the menu Help > Check for Updates. Use this option to find if a new version of Ubiqua is available.
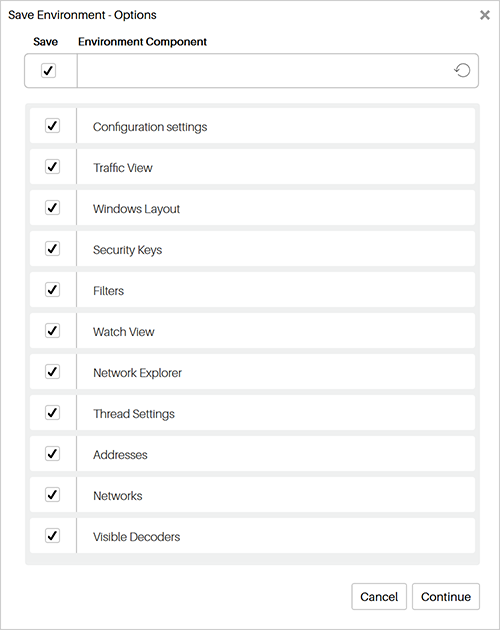
Environment Files
Environment files include all the current selections and values of the Preferences dialog including address relationships, security keys, and others. These files do not store any license information.
To save an environment file click the File > Save Environment menu item, after this a dialog window will open displaying the Save Environment Options window for you to select those preferences you want to save in your environment file, click Continue and select the location where you want to store the new environment file, and name it.
To load an environment file click the File > Open Environment menu item, browse your environment file on your computer and click the Open button.
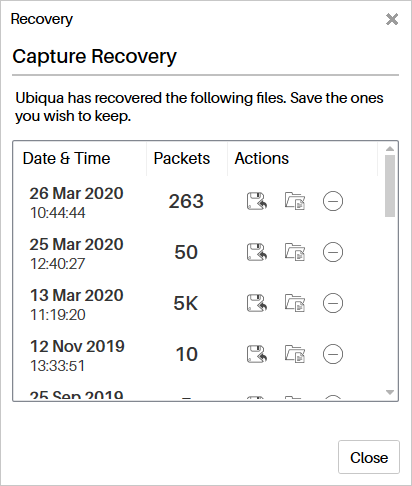
Capture Files Recovery
Ubiqua will help you to recover the last capture if an error occurred and the application closed unexpectedly. When Ubiqua is started it checks for orphan files and presents a Capture Files Recovery dialog where you can select from a list of recoverable files with the corresponding date and time of when the problem occurred and the number of packets, select the file and click on the Recover Capture button and all the packets will be automatically loaded on your Traffic View. You can also open this window from menu Tools > Recovered Captures